Infiniti QX60 Forum banner

JX35 Front Struts , Rear Shocks, Sway Bar Links and Sway Bar Bushings OEM Suspension Upgrade

18K views 85 replies 7 participants last post by  champaign 777  
#1 · (Edited)
Front Struts , Sway Bar Links and Sway Bar Bushings:

So long story short, when I bought my infiniti JX35 35k 5 years ago I had doubts about front struts and I was right . Something was wrong with them ( this low sound aka bum boom boom going over bumps and some additional clunking noises ) . This was not critical at all on a highway so I stayed with them for another 80k miles hah ... With all today's situation and being a Smart Ape who hates monthly payments I decided to keep this car . It is good , really good with all Tech , all possible options including Theater it's just not in my book to replace it for something similar +$50k on the top of my head LOL but front suspension needs some tunes so i replaced front sway bar links and all is left to replace the struts and upper struts mounts + sway bar bushings

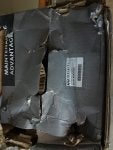
I decided to go with new OEM FULL STRUTS/SPRINGS Assembly and here are my results :

Image
Image


I was doing some intensive researches and end up with
<<< Suspension Strut and Coil Spring Assembly >>>
which are HARD to find so i am sharing with you guys the OEM part numbers
E6C00-9NFOKNW
E6C01-9NFOKNW

Most dealers are selling parts but replace Assembly with 5 bolts/connections total is one thing and replace failing strut parts is like 5x more job LOL just to suppress the springs can wipe out most of fox here LOL

Just FYI :
Just a LABOR cost of struts / shocks , sway bar links / bushings replacement all around ( parts are NOT included ) will be around $2000-2500
Parts itself ( OEM ) are around $700-800

Worse the try !!!
 
#4 ·
Front Sway Bar Bushings:

TO do the front sway bar bushings is a pain in the ass ...
I think i spent more time on these 2 bushings than on entire front struts assembly
U will definitely need some specials ratchet like i show you on this picture
The access to these bushings is SUPER tight !!!!!

Image
 
#5 ·
Rear Shocks , Sway Bar Links and Sway Bar Bushings:

The rear is going IN 2morrow

All OEM sway bars / sway bar bushings and Shocks are ready to Rock & Roll !!!!!!!!

Image


All Rear torque we need for this job :

Shocks upper bolts , Shocks low bolt , sway bar links , Sway bar bushings
I market in black what is relevant

BTW ,- shocks are the same Left Right ( this what i learned from OEM parts )

Image
 
#6 ·
So the rear was done today that was really simple

Image


One think i learned during this process - OEM Infiniti is made by KYB so next time going to keep this thread to
rebuild shock/struts with KYB instead of OEM . This should save like $200 on this project
Cheers !

Image
 
#8 ·
Love your posts and pictures. Thank you.

I have 155k on my JX35 and I often wonder if my struts are worn out. Other than the initial “boom” sounds, what other symptoms show a bad strut?

I’ve replaced the rear struts, very easy but I worry about the front struts since they have a huge spring. Did you have to compress the front strut to remove/reinstall?
 
#14 · (Edited)
a) Yes the "boom" sound i believe is a natural sound and u cant do much about it
Even with a new strats i still have this low sounds "boom boom"
b) The major problems are struts degradation aka bouncing, shaking , clicks and it usually happens after 70-100k miles
c) I didnt compress spring as i bought OEM struts assembly with everything already
Should not be a problem to compress springs with such compressor below
I actually bought after all it and compressed my OLD struts to reuse springs next time.
The upper strut mount like this one
you can reuse as well .There is no bearing inside so its a one peace of rubber so no rear wear .
Good Luck !
 
#11 ·
I can get to the front bolts, barely, with a smaller ratchet through the wheel well - but how did you get to the back bolts? I can get a ratchet on them, but have about 3 degrees of motion, not enough to let the ratchet click to the next detent.
 
#12 ·
Thanks. I finally managed to get my sway bar bushings replaced last night. Uff.... On the driver side I used socket with universal joint ( flexible extension ). I got it in between those two lubrication lines on rack on pinion. Passenger side was a little bit easier.
I didn't remove front wheels. I drove my car on the ramps.
With the new struts, sway bar links and bushings - car drives like new again. Today I am gonna replace rear shocks + new tires ( Michelin Defender LTX) & wheel alignment.
 
#17 ·
Finally got the driver side sway bar bushing bracket off - drivers side wheel off, up on jacks - but the sway bar is pressing down on the old bushing and I cannot get it out - do I have to jack up the wheel to take the pressure off the sway bar, or just use a bigger pry bar to lift it up off the bushing?
 
#20 ·
Great job! Yesterday I got my rear shocks replaced (KYB g-force), rear sway bar bushings and lateral arm. I got all my parts from Infiniti with better deal than Rock Auto. My car has 142k milles. Rear shocks didn't move at all. What a different!
 
#21 ·
Great , looks like this thread finally got attention and people do care about this car đźš— . I personally want to keep this car for some more time , maybe another 50k miles or so up to 200k .We do have 2 infinities and one electric VW id.4 but this car is a great cruiser going long trips ! The car is great I have full tech pkg , cinema pkg and all options for 2013. Also installed Radar detector , Front and back cameras , headup display and more . A lot of modern cars don't have even half options my car has so one of the reasons to keep it and upgrade / fix whatever is needed . My washer tank just failed with -10f outside so bought new oem tank , need to replace it asap !
 
#25 ·
I’ve replaced my JX35 rear struts a while back, an easy job since it’s easy disassemble, but my front struts are original at 155k miles.

I’m curious, my front lower control arm bushings are cracked and need to be replaced. Since our vehicles are the same year, were your bushings in good shape? I’m thinking the front strut AND control arm are in the same area so they can be knocked out at the same time.

Given your experiences, any concerns with this approach?
 
#26 ·
I’ve replaced my JX35 rear struts a while back, an easy job since it’s easy disassemble, but my front struts are original at 155k miles.

I’m curious, my front lower control arm bushings are cracked and need to be replaced. Since our vehicles are the same year, were your bushings in good shape? I’m thinking the front strut AND control arm are in the same area so they can be knocked out at the same time.

Given your experiences, any concerns with this approach?
If you mean the rubber around the bushings, my understanding is that it looks cracked after a couple of years in most cases, but that does not mean it is compromised or needs to be replaced. I saw surface cracks on mine, but it appeared intact. Front strut replacement was pretty easy, took maybe 90 minutes per side. But I had an extra bottle jack to lift the whole assembly up to take off the tension so I could undo the sway bar link arms (they are cheap and easy to replace, if not rusted too badly. Cut them off rather than fight with them), and then the new Munroe struts were a bit longer, it seemed, so had to pry down the wheel assy to get the bolts in, then jack it up again with the bottle jack to get the sway bar links arms back in. Just watch the orientation of the top of the strut, there is a rubber tab that has to be oriented wrt the vehicle (facing outward, I believe)
 
#36 · (Edited)
Fellas so my car has 140k++ miles as of now and all started from AC stopped working ha !
Did a software check and all is engaged so all was fine .
Tried to add some AC Refrigerants but no luck !
AC was working fine for like 5-10 min and then all cold air just gone !
After some research and AC leak verification on my car i ended up with a new Valeo OEM AC compressor
This is not a simple process , - u will need to remove old compressor, remove all transportation oil from the new compressor , install a new compressor,
vacuum entire system for 1h , be sure that no more AC leaks and a new compressor fixed it . Then u will need to add 8oz PAG Oil refrigerant into the system
first . Dont worry it will be distributed by itself to all components ! And last u will need to add 134a refrigerant into the system
So i know the theory but still I am in process to do it in practice , all help on this topic is appreciated !


Image
 

Attachments

#37 · (Edited)
So parked my car for entire month now LOL

Image

when looking for AC compressor came up with the list of thing in to do list :
Replaced Valve Cover gasket - DONE !
Just did a front as it was leaking the most , no power left to do it for the rear and its **** as complicated so this can wait and also no major leaks on this side
Cant comment on a quality but i did a test and no more leak so this one was good

Image
 
#38 · (Edited)
Next started to check under the car and found transmission to radiator oil line leaks ... not fun !
I finally replaced the rubber lines and also replaced OEM clamps ( they are NOT good after 7-10 years ) to some aftermarket clamps
No more transmission oil leaks ! DONE !

Image


When i am there replaced my Radiator Fan Assembly on 150k miles
It was a time to do it ! Too much noise !

Picked up from ebay TYC made in Taiwan looks like a good value !

Image
 

Attachments

#39 ·
Next
My oil pan is rusted ! I mean heavily rusted so no oil leak YET but i better replace it when i am here right ?

This can be aftermarket staff so got some from amazon :

Oil pan
Oil Pan gasket
Oil pan Gasket removal tool
NOT done yet !

Image
 
#40 · (Edited)
Its NOT all for a car with almost 150k miles which still drive like a new ha

Oil Cooler Coolant line ... what the heck is this crap right ?

Its rusted as **** so if u dont want your Coolant gone and engine overheated u better do it as well
Its on the left side where AC compressor and to be able to remove AC compressor u will need to remove this line anywhere so ...
I got OEM and cost me like $45
not YET installed !!!

Image
 
#41 · (Edited)
Now if you already there why not to replace
Oil Cooler Gasket
When u replace oil filter it sits on this Oil Housing which they call Oil Cooler !
its super easy to replace NOW not when it will start leaking ( my was OK btw )
Just get 22m deep socket , 20-30 min and you done
I got some aftermarket gonna do it this week !

Image